
Quicklinks:
Save Items to Specific Folders
You can use your personal My EBSCOhost account to collect and store information across sessions. All the items you save to your personal folder remain in your folder until you remove them. Only you can access your My EBSCOhost folder.
To create a My EBSCOhost account:
Click the Sign In in the top right of the toolbar of the screen.
On the new screen, click the Create a new Account link.
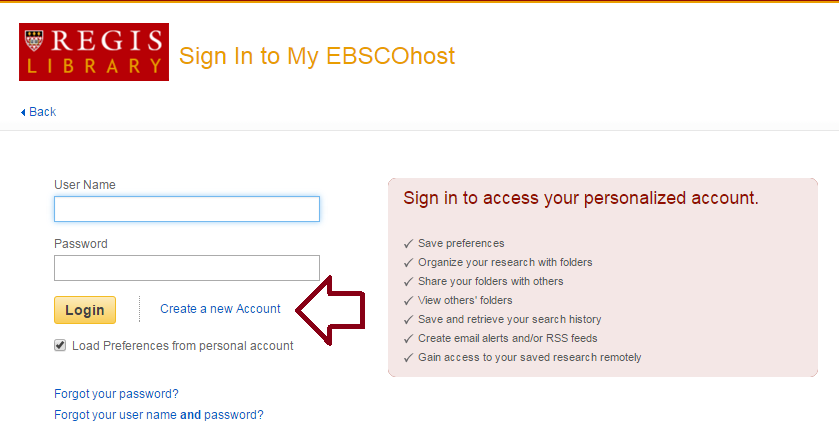
The Create a New Account Screen appears with Personal Account entered in the Account Type field. Fill in the fields on the Create a New Account Screen. When you have completed the fields, click Save Changes.
If all the information was accepted, a message appears that provides your user name and password. Click OK. You will be automatically logged in as a personal user. You should note the user name and password you created so you can log in at a future session.
To save items to your My EBSCOhost folder:
Sign in to your My EBSCOhost account.
Search for the information that you want to save in your folder. You can save all types of search results to your folder. (For example, articles, links to searches, images, etc.)
Add the items to your folder in any of the following ways:
Add one item – Click the folder icon  located to the right of the article title. This adds only the single selected item to your folder. If you have custom folders in your account, select a folder to add the article to.
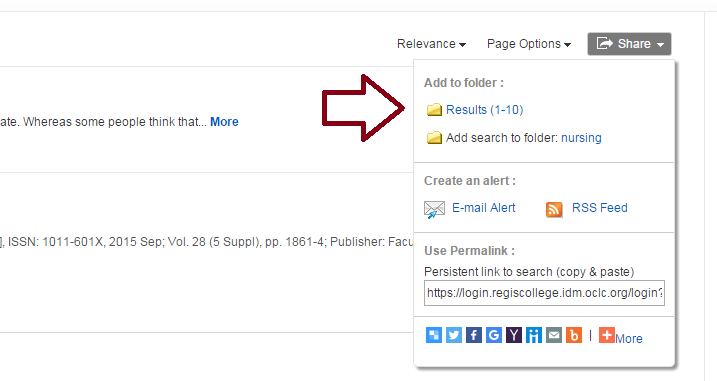
Add all the items on the page – Click the Share link and then click Results (1–10) link at the top of the menu. This adds all items listed on the page to your folder.
When the article result is added to the folder, the folder icon will change to a folder item icon  . Clicking this icon will remove the result from your folder.
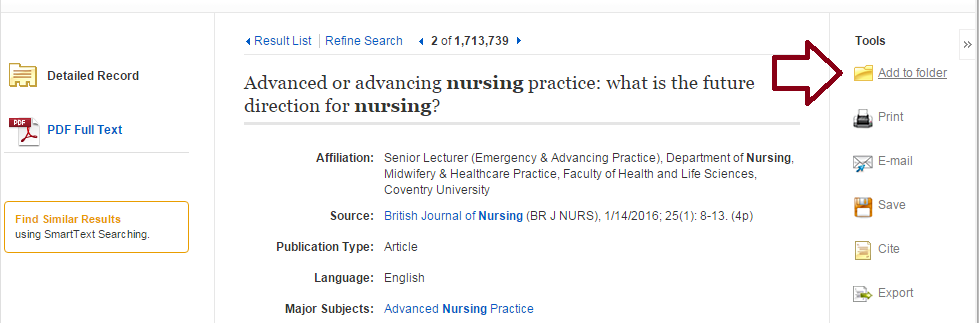
From the Detailed Record, you can add one item. Click the Add to Folder link at the top of the tools menu. This adds only this single item to your folder.
To view the contents of your My EBSCOhost folder:
Sign in to Your My EBSCOhost account and then click the Folder link at the top of the page.
View the contents of your My EBSCOhost folder. Your folder contains links to your saved items in groups such as Articles, Images, Journal Alerts, Saved Searches, etc.
Click a folder location from the left column to see the items in a group.
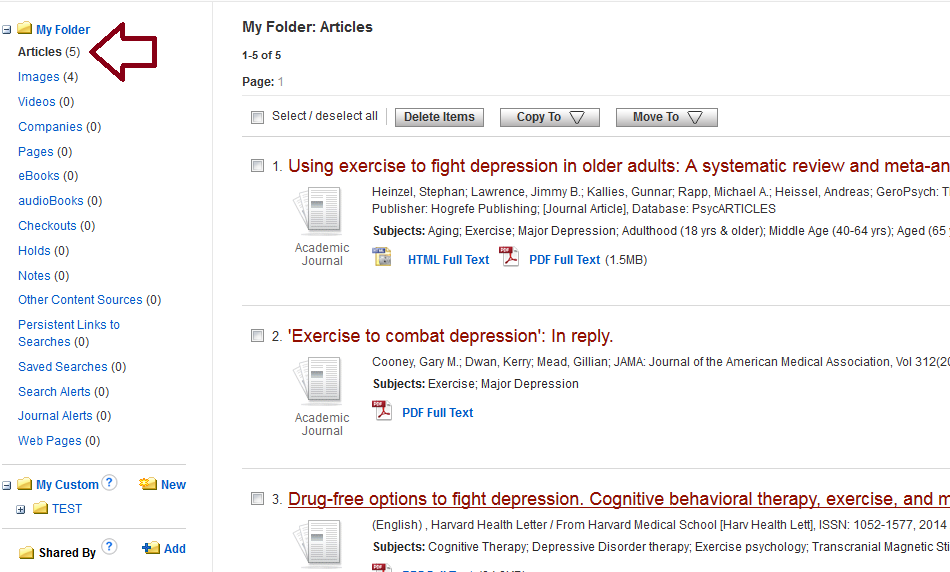
Click an individual item (for example, a magazine article or an image) to display the full detail for the item.
Sign in to Your My EBSCOhost account and then click the Folder link at the top of the page.
Click the My Custom New link.
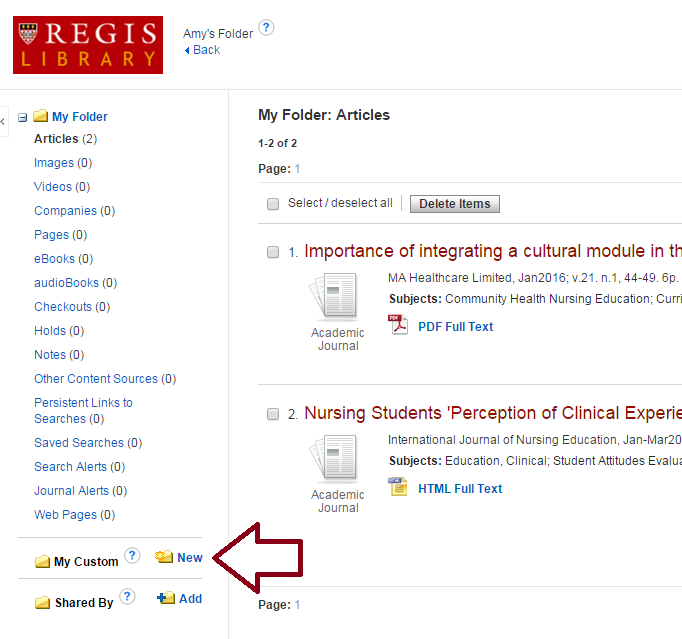
Choose a name for the folder that you want to create.
Click Save.
This folder will now appear as an option whenever you save an article.
To save articles to a specific folder:
If you have custom folders created within your My EBSCOhost folder, you can specify which folder you would like your articles saved in, when you click the Folder icon .
When you click the Folder item icon , the name of the folder which contains the article displays a folder icon.
To move the article to a different folder, click the name of the folder you would like to move the article to.
To remove the article from the folder entirely, click the name of the folder that contains the article.
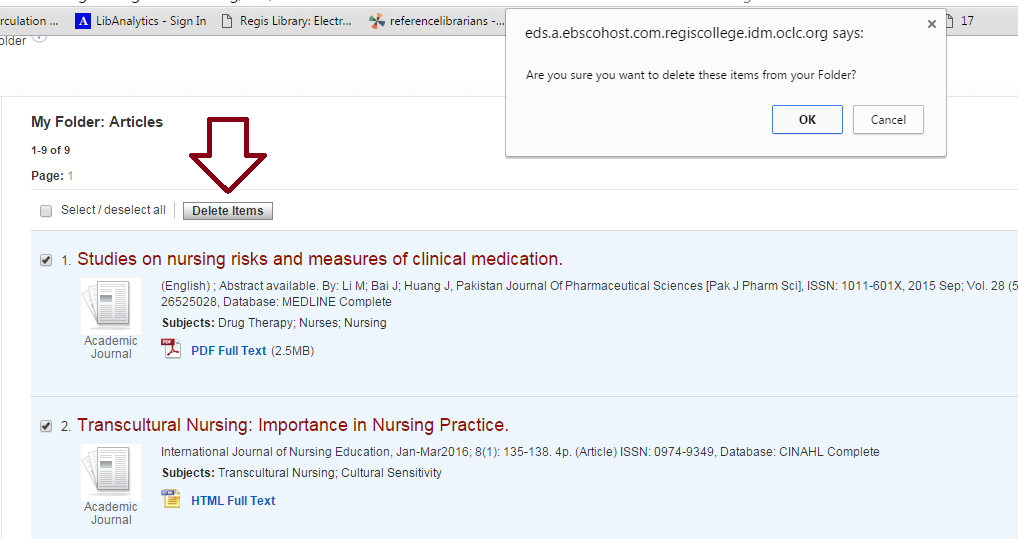
To remove items from your My EBSCOhost folder:
You can remove all the items displayed in a group (for example, Articles) or remove an individual item.
Display the items that you want to remove from your folder.
Mark the check box for any folder item that you want to remove, and then click the Delete Items button.
EBSCO has a great tutorial on using the cite feature. Click on the link below to see it.